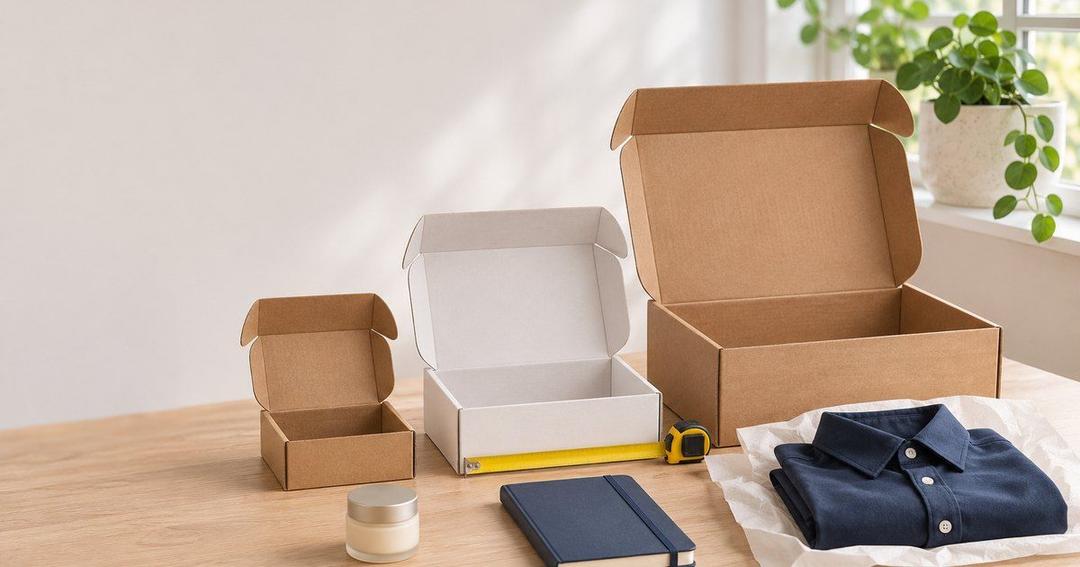
Mailer Box Sizes: How to Measure Your Product and Pick the Right Inner Dimensions
Inkprint Team
Published: November 14, 2026
If the box is too big, your product moves around, you need more filler and you pay courier charges for empty space. If it's too small, the lid bulges, corners crush and the unboxing feels cheap. Picking the right mailer box size is one of the simplest ways to lower damage and shipping costs.
This guide covers how to measure, how much clearance to add, how to read box dimensions, and some sizes that work well for common products.
Quick answer
Measure the product (or the product in its inner pack) at its longest, widest and tallest points.
Add clearance: about 3–5 mm on each dimension for a snug fit, more if you add tissue, an insert or a thank-you card.
Order that size as the box's inner dimensions, written Length × Width × Height.
Check the outer size against your courier's volumetric weight before you finalise.
Step 1: Measure the product the right way
Measure the packed product, not the bare item. If a jar goes into a pouch, or a shirt is folded with tissue, measure it exactly as it will go into the box.
Use the widest point. Caps, handles, pumps and rounded edges count.
Measure in millimetres. Packaging is made in mm, and a 2–3 mm error matters on a tight fit.
Measure kits together. For a set or hamper, lay out the items the way you want them to sit and measure the whole layout.
Step 2: Add clearance
Clearance is the small gap between the product and the box walls. A good rule of thumb:
What goes in the box | Clearance per dimension |
|---|---|
Single rigid item, snug fit (book, boxed product) | 3–5 mm |
Folded clothing with tissue | 10–15 mm on length and width, 5–10 mm on height |
Fragile item with bubble wrap or crinkle paper | 15–25 mm all round |
Product with a custom insert | Size the box to the insert, not the product |
Don't over-pad to make up for a box that's too big. A box that fits well with a little filler protects better than a large box full of paper.
Step 3: Understand L × W × H, inner vs outer
Length (L): the longer side of the opening.
Width (W): the shorter side of the opening.
Height (H): the depth, from the base to the lid.
Always give your packaging supplier the inner dimensions, the space your product actually has. The outer dimensions are bigger because of board thickness. For example, a box with an inner size of 250 × 200 × 80 mm made in a thicker 5-ply board will measure several millimetres more on every side on the outside.
Thicker board means a bigger gap between inner and outer size. If you're unsure which board strength you need, read our guide to 3-ply, 5-ply and 7-ply corrugated boxes.
Step 4: Check the courier's volumetric weight
Couriers charge on whichever is higher: actual weight or volumetric weight. Most Indian couriers calculate it as:
Volumetric weight (kg) = L × W × H (cm) ÷ 5000
(Some services use a different divisor. Check yours.)
Example: a 30 × 25 × 10 cm box has a volumetric weight of 1.5 kg, even if the product weighs only 400 g. Cutting the height to 7 cm brings it down to 1.05 kg. On thousands of orders a month, a few millimetres can make a real difference to shipping costs.
For more on choosing shipping boxes by strength and cost, see Packing Boxes for Shipping: A Step-by-Step Guide.
Starting-point size chart by product type
These sizes are starting points to measure against, not fixed rules. Always confirm with your own product measurements.
Product type | Typical inner size (L × W × H, mm) | Notes |
|---|---|---|
Jewellery, small accessories | 150 × 100 × 50 | Add a small insert to stop movement |
Skincare / cosmetics (2–3 items) | 200 × 150 × 70 | Allow for pump or dropper height |
Folded T-shirt | 250 × 200 × 50 | One shirt with tissue |
Shirt, kurta or folded dress | 300 × 250 × 70 | Add height for heavier fabric |
Books, journals, diaries | 250 × 180 × 50 | Snug fit stops corner damage |
Candles, mugs, glass items | 200 × 200 × 120 | Leave room for protective wrap |
Gift hamper / subscription kit | 350 × 250 × 100 | Size to the insert layout |
Common sizing mistakes
Ordering by outer size by mistake. The product won't fit because the board takes up the space.
Forgetting the extras. Inserts, cards, tissue and stickers all take up space.
One box for every product. Two or three standard sizes usually cover most of a catalogue and keep stock simple.
Skipping a sample. Always test-pack a physical sample before a bulk run.
Get the right size for your brand
Once you have your inner dimensions, browse our custom printed mailer boxes and share your measurements with the Inkprint team. We'll help you match the size and board strength to your product before printing.
Frequently Asked Questions
Get in Touch
Still have questions? Fill out the form below and our team will get back to you shortly.